Have you ever witnessed a situation, when you write an application in a team and you constantly break somebody's else code after push? Or, the other way around, you pull the code from the repository and your code stops working? I have witnessed this situation many times and I got used to the hear the sentence ' ... but it was working before ...' quite often. For what is worse, I was fixing the same issue over and over again. Very frustrating ...
Therefore I was trying to look for a solution on the web. If you have ever looked for it already, you have probably found a software called Selenium. As it states on the web, Selenium automates browsers. It's a tool / API, you can use to control the browser. Primarily, this tool is used for 'acceptance testing'. That means you can write down a bunch of commands to tell the browser to repeat some actions on your website, e.g.:
- Login to your website
- Create an article
- Verify, if the article was saved successfully
etc ...
Selenium basically comes in two flavors:
- Selenium IDE
- Selenium Webdriver
'Selenium IDE' is a firefox plugin, which can be used to record and playback some browser commands, while 'Selenium Webdriver' is a collection of language specific bindings (libraries), which drive the browser. Java, Ruby, Python, Javascript, PHP, you name it ... This article will describe, how to quickly setup an environment to test my custom CMS web application using Python. I choose Python, because of it's native support in Linux - my native development operating system.
First of all, we need to install 'pip'. Pip is a software management library for python:
sudo apt-get install python-pip
Afterward, we can install Selenium:
pip install selenium
For all my tests, I will use Google Chrome, therefore I need to download the Chromedriver package (Webdriver implementation of Google Chrome). It's an executable file, which I will copy to my home directory (e.g. /home/marusiju/.chromedriver/chromedriver) - the last item is the name of the file.
We are ready now to test the application.
Now, in my web project root directory, I'll create a 'tests' folder, where I will store all my selenium test scripts. Within this folder, I'll create a brand new 'login.py' file with the following content:
from selenium import webdriver
from selenium.webdriver.common.keys import Keys

driver = webdriver.Chrome('/home/marusiju/.chromedriver/chromedriver')
driver.get("http://dev.yuma.sk/administrator")
emailElem = driver.find_element_by_name("email")
emailElem.send_keys("durino13@gmail.com")
passwordElem = driver.find_element_by_name("password")
passwordElem.send_keys("secret_password")
button = driver.find_element_by_tag_name("button")
button.click()
assert "List of articles" in driver.page_source
driver.close()
And this is how I execute the test:
python login.py
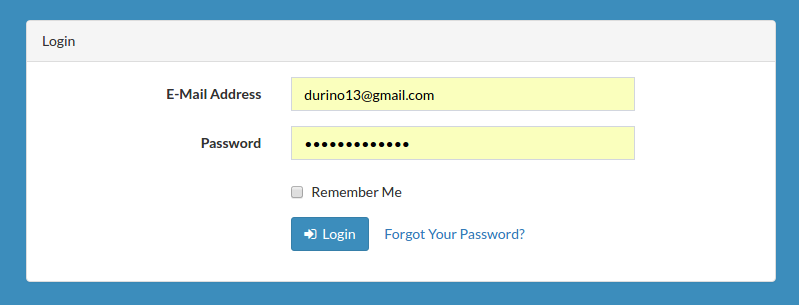
What this script does is, it will open the dev.yuma.sk/administrator URL in the Chrome and it will attempt to login on the web (a browser window will be spawned and you will see some actions being executed on the screen). This is how it will look like:

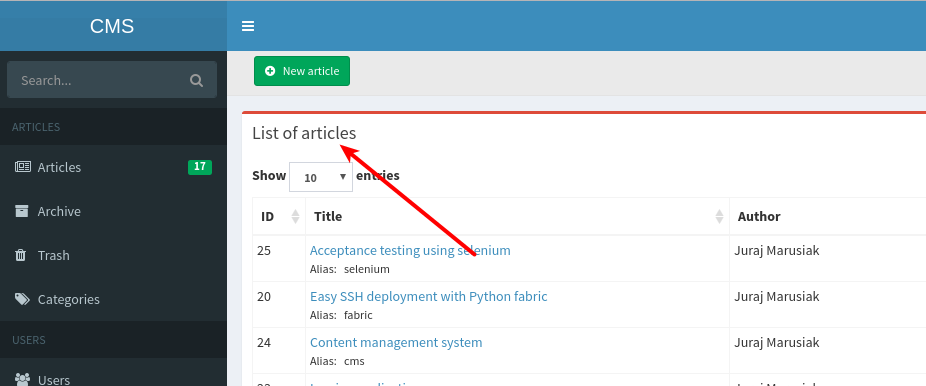
The script will automatically enter the credentials and it will press the 'Login' button to login into the application. Once logged in, it will assert the text 'List of articles' on the web page. If present, the login was successful.

So far, so good ;) The test passed ... How do we know it? Well, it did not produce any error ;)
marusiju@marusiju-pc:~/www/cms/tests$ python login.py

marusiju@marusiju-pc:~/www/cms/tests$
It would be better however, if we can see some results after the test is finished. We can therefore leverage some help of a python's testing framework called 'unittest' in order to see some test results in the console. The framework has also some built-in functionalities, which will help us to organize our test code too. Instead of putting all the code into one file, we can split our testing code into separate files, called 'test cases'. Later on, we can combine multiple test cases into a 'suite' and we can execute the suite itself. Let's see, how we can achieve that:
First let's rename the 'login.py' file to 'LoginTestCase.py' and adjust the content as follows:
import unittest
from selenium import webdriver
from selenium.webdriver.common.keys import Keys

class LoginTestCase(unittest.TestCase):

    def setUp(self):
        self.driver = webdriver.Chrome('/home/marusiju/.chromedriver/chromedriver')

    def test_login(self):
        driver = self.driver
        driver.get("http://dev.yuma.sk/administrator")
        emailElem = driver.find_element_by_name("email")
        emailElem.send_keys("durino13@gmail.com")
        passwordElem = driver.find_element_by_name("password")
        passwordElem.send_keys("secret_password")
        button = driver.find_element_by_tag_name("button")
        button.click()
        assert "List of articles" in driver.page_source

    def tearDown(self):
        self.driver.close()

if __name__ == "__main__":
    unittest.main()
As you can see, we have added some new methods into the file. The 'setUp()' method will be executed before every 'test' method executed in the LoginTestCase.py file. Similarly, the 'tearDown' method will be executed after every 'test' method is completed.
When we execute the test now, we will see the following output (after the Chrome browser is closed):
marusiju@marusiju-pc:~/www/cms/tests$ python LoginTestCase.py
.
----------------------------------------------------------------------
Ran 1 test in 3.988s

OK
That's better already. We know, our test passed successfully. We can now add some additional test cases. Let's create a new article test case (ArticleCrudTestCase.py) and adjust some stuff in the code as follows:
import unittest
import DriverManager
import LoginTestCase
from selenium import webdriver
from selenium.webdriver.common.keys import Keys
from selenium.webdriver.support.ui import Select

class ArticleCrudTestCase(unittest.TestCase):

    baseUrl = 'http://dev.yuma.sk'

    def setUp(self):

        # Get the driver instance
        self.driver = DriverManager.getDriver()

    ##################################
    # Create the article
    ##################################

    def test_1_create_article(self):

        # Get the driver
        driver = self.driver

        # Login
        unittest.main(module=LoginTestCase, exit=False)

        driver.get(self.baseUrl+'/administrator')
        driver.find_element_by_id('new_article').click()

        title = driver.find_element_by_name('title')
        title.send_keys('Selenium test article')

        alias = driver.find_element_by_name('alias')
        alias.send_keys('selenium_test_article')

        # body = driver.find_element_by_id('article_text')
        # body.send_keys('This is the article text {{!--readmore--}} And this is the rest of the text after readmore')

        status = Select(driver.find_element_by_name('status'))
        status.select_by_value('1')   # Unpublished

        # Handle chosen select jQuery plugin
        driver.find_element_by_id('categories_chosen').click()
        driver.find_element_by_xpath('//li[@data-option-array-index="1"]').click()

        # Save the article
        driver.find_element_by_id('save_and_close').click()

        # Verify if the article was successfully saved ..
        messageElem = driver.find_element_by_css_selector('#fouc > div > div.status-message > div > ul > li')
        assert messageElem.text == 'Article was successfully saved!'

        # Get the ID of the saved article
        self.__class__.articleID = driver.find_element_by_css_selector('tr.odd:nth-child(1) > td:nth-child(1)').text

    ##################################
    # Update the article
    ##################################

    def test_2_update_article(self):

        driver = self.driver

        # Open the newly created article
        driver.get(self.baseUrl+'/administrator/article/'+ self.__class__.articleID+'/edit')

        # Press the save button
        driver.find_element_by_id('save').click()

        # Verify if the article was successfully saved ..
        messageElem = driver.find_element_by_css_selector('#fouc > div > form:nth-child(1) > div.status-message > div > ul > li')
        assert messageElem.text == 'Article was successfully saved!'

    ##################################
    # Trash the article
    ##################################

    def test_3_trash_article(self):

        driver = self.driver

        # Trash article
        driver.get(self.baseUrl+'/administrator/article')
        driver.find_element_by_id('actions_container_' + str(self.__class__.articleID)).click()
        driver.find_element_by_id('trash_'+str(self.__class__.articleID)).click()

        # Wait for the message to be displayed on the page
        driver.implicitly_wait(1)  # seconds

        # Verify the article is in the trash
        message = driver.find_element_by_css_selector('.alert > ul:nth-child(1) > li:nth-child(1)')
        assert message.text == "The article was successfully trashed!"

if __name__ == "__main__":
    unittest.main()
We also need to modify the LoginTestCase.py file a bit:
import unittest
import DriverManager
from selenium import webdriver
from selenium.webdriver.common.keys import Keys

class LoginTestCase(unittest.TestCase):

    def setUp(self):
        self.driver = DriverManager.getDriver()

    def test_login(self):
        driver = self.driver
        driver.get("http://dev.yuma.sk/administrator")
        emailElem = driver.find_element_by_name("email")
        emailElem.send_keys("durino13@gmail.com")
        passwordElem = driver.find_element_by_name("password")
        passwordElem.send_keys("secret_password")
        button = driver.find_element_by_tag_name("button")
        button.click()
        assert "List of articles" in driver.page_source

if __name__ == "__main__":
    unittest.main()
Notice, we have imported a new python module called 'DriverManager'. It's a custom module (file), which is used to create a 'global' driver instance, so we can share the 'webdriver' between the test cases. We do this in order to share the same Chrome window between the test cases. If we don't do this, the Chrome window will be closed after the first test case and when the second test case will be started, it will open a new window with the 'login' page again ... That's not desirable.
Here's how the DriverManager.py file looks like:
from selenium import webdriver

driver = None

def getDriver():
    global driver
    driver = driver or webdriver.Chrome('/home/marusiju/.chromedriver/chromedriver')
    return drive
Now, in our test cases, we can grab the same 'webdriver' and we will share the Chrome window between the test cases. The last, but not least, we need to create a test suite file, which will be responsible for executing both our test cases:
import unittest
import LoginTestCase
import ArticleCrudTestCase

# Create the loader and the suite
loader = unittest.TestLoader()
suite = unittest.TestSuite()

# Add the test cases into the suite
suite.addTest(loader.loadTestsFromModule(LoginTestCase))
suite.addTest(loader.loadTestsFromModule(ArticleCrudTestCase))

# Run the suite
runner = unittest.TextTestRunner(verbosity=3)
result = runner.run(suite)
And this is how we start the suite:
python TestSuite.py
test_login (LoginTestCase.LoginTestCase) ... ok
test_create_article (CreateArticleTestCase.CreateArticleTestCase) ... ok

----------------------------------------------------------------------
Ran 2 tests in 6.831s

OK
Similarly, you can add as many test cases as you want in your suite.
Additional notes
- Every test case should be independent of the previous one. Ideally, the CRUD test case should be divided into 3 separate test cases: CreateArticleTestCase, UpdateArticleTestCase, DeleteArticleTestCase. So far, I did not find a reliable way, how to share the article ID between the test cases, therefore I put all the CRUD code in the same file. Although this seems to be a common scenario, I did not find a definite solution for this problem.
- I have tested both the Selenium IDE and Selenium Python bindings and so far, I was able to do everything using the Selenium IDE. Actually, there was no need to do the stuff programmatically .. The advantage of the IDE is, that it generates the element locators (selectors) automatically and it's quicker to create the TEST this way.
- So far, I am still in the process of trying to be effective with Selenium. The thing is, it requires quite a lot of time to create and maintain the test cases. The biggest benefit for me is, you can test your software before you release it. So far, Selenium did not save much time for me, as I was forced to update the tests quite often (as the application was changing). I am sure however, I will be able to use it effectively after some time.
Sources